How to Replace Your Miele Vacuum Power Switch
So your Miele vacuum won’t turn on. What now? Miele vacuums are renowned for their great quality and long-term durability, but even these robust machines require some maintenance and Miele repair service from time to time. Fortunately, getting Miele vacuums repaired is easy thanks to Miele’s network of authorized service providers, like us! Miele repair technicians are trained in the company’s special technology and have access to required spare parts, so they can efficiently identify any issue quickly. Some repairs, however, can be repaired at home with just a couple of tools, parts, and a little spare time.
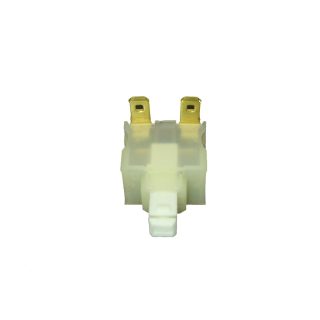
In this article, we are going to be showing you how to fix one of the most common issues with Miele canister vacuums: power switch failure. You will notice this issue right away because your Miele vacuum will no longer turn on, making it essentially useless. Thankfully, the Miele switch repair part for this issue is not expensive, and our in house Miele expert has made a video showing you how to complete this repair yourself.
If the power switch is not your issue, you are going to want to check out our articles for how to replace a Miele cord reel and how to replace a Miele motor.
You can find the Miele power switch for most Miele canister vacuums and check compatible models here:
How to Fix Miele Vacuum Not Turning On
Step-by-step Guide
If your Miele canister vacuum cleaner is not turning on, the best-case scenario is that the power switch is faulty. In this case, you will need to replace the power switch. In this article, we will provide a step-by-step guide on how to replace the power switch in a Miele canister vacuum cleaner.
Before we get started, it’s important to note that Miele canisters are difficult to get into, and there is a risk of breaking the components. Therefore, you should be careful while working on your vacuum cleaner. Additionally, the steps may vary depending on your Miele model. The model used in this guide is an S8, which is the same as the C3.
Step 1: Remove the Strip
To begin, take a putty knife and remove the strip that connects the top and bottom halves of the machine. This strip is located around the machine, and you can start by taking it apart from the top. Similar to working on a Samsung or iPhone, the machine is pressed together, and you must pop it in the right places to get it apart.
Step 2: Remove the Power Switch
Once you have removed the strip, you can access the power switch. You will see a tab at the rear of the switch that you need to press to get it to pop off. Repeat the same process on the other side of the switch, and it should be loose. The rear wheel can now slide out, and you can remove the lid with a flathead screwdriver.
Step 3: Remove the Upper Housing
The upper housing is held by T20 size screws, which you need to remove. If the housing does not come apart, try popping it on the side a few times to loosen it up. The gray strip coming off is a separate piece, and you will now have the upper housing exposed.
Step 4: Access the Power Switch and Circuit Board
Once you have removed the upper housing, you will be able to see the power switch and circuit board. However, you cannot test the switch yet because you cannot get to the wires. You need to remove two other screws, one that is hidden under the filter and one that is buried deep down. You will need a long T20 torx bit to reach the screw buried deep down.
Step 5: Test the Power Switch
With the power switch exposed, you can now test it for continuity. Use a multi-meter and set it to the continuity setting. Touch both poles of the switch with the multi-meter. You should hear a beep if the switch has continuity. Turn the switch off, and you should have no continuity. If there is no continuity in the on position, your power switch is faulty, and you need to replace it.
Step 6: Replace the Power Switch
If you have determined that the power switch is faulty, you need to replace it. The cost of a power switch ranges from $15 to $25, and the installation varies depending on your Miele model. To replace the power switch, follow the steps in reverse order.
In conclusion, replacing a power switch in a Miele canister vacuum cleaner can be a tricky task. You must be careful while working on your vacuum cleaner to avoid breaking any components. However, with this step-by-step guide, you can replace the power switch in your Miele canister vacuum cleaner and get it working again.