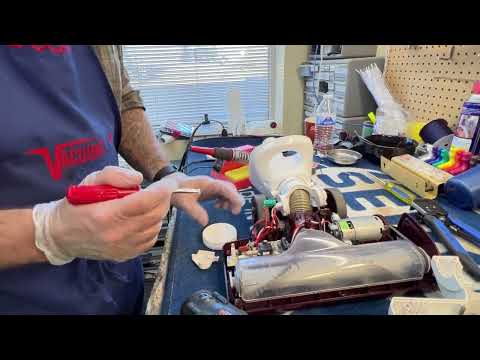
Step 1: Preparation
Before beginning any repairs on your Shark Navigator 650 vacuum cleaner, prioritize your safety by ensuring it is turned off and unplugged from the power source.
Step 2: Accessing the Lower Hose
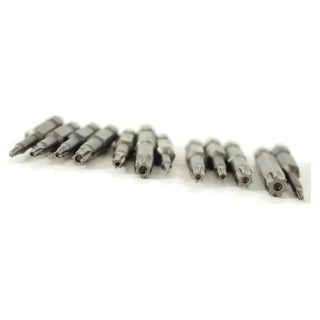
Locate the lower hose on your Shark Navigator vacuum, which might be positioned either at the bottom or rear of the appliance. Identify the screws holding the lower hose in place and, depending on your model, use a screwdriver with Torx or Security bits to remove them. Find these specialized bits for Shark vacuums here.
Step 3: Detaching the Old Lower Hose
Gently detach the old lower hose from the vacuum, employing careful twisting and pulling techniques to avoid damage to other components. Take this opportunity to inspect the hose for any signs of damage or clogs that may need attention.
Step 4: Installing the Replacement Hose
Attach the replacement lower hose to your Shark NV650 vacuum, ensuring a secure connection similar to the original hose. If applicable, reattach any hose attachments. Note that you’ll need to apply glue to affix the new lower hose to the fitting, allowing time for it to dry. Find the suitable glue for this task here.
Step 5: Securing the New Hose
Utilize the screwdriver to reinsert and tighten the screws, securing the new lower hose in its designated place. This step is vital for maintaining stability and ensuring the proper functioning of your vacuum.
Step 6: Checking for Leaks
After completing the replacement, conduct a thorough inspection of the vacuum for potential leaks or loose connections. Power on the vacuum and test for consistent suction, listening for any unusual sounds that may indicate issues.
Step 7: Final Steps
Wipe down your Shark Navigator vacuum with a clean cloth or towel to remove any accumulated dust or debris. Responsibly store or dispose of the old lower hose.
Conclusion:
Replacing the lower hose on your Shark Navigator vacuum is a task that, when done correctly, can significantly extend the appliance’s lifespan. By following these detailed steps, you can confidently complete the replacement process, restoring your vacuum’s optimal performance and contributing to a cleaner and healthier living space. While Shark vacuum repairs may present challenges, our efforts are aimed at minimizing waste and maximizing the functionality of these appliances.