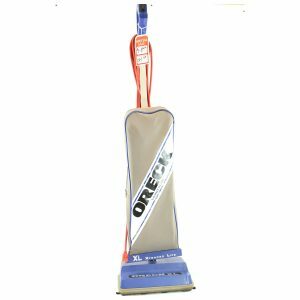
How To Unclog An Oreck XL21 Vacuum Cleaner
Dealing with a clogged vacuum can be a frustrating experience that often occurs unexpectedly. However, if you are a homeowner with an Oreck XL vacuum cleaner, the process of unclogging it doesn’t have to be daunting. In this article, we will show you how to quickly and easily unclog your vacuum.
To begin, always ensure that the power is off before performing any maintenance or repairs. Next, check the tubes and airflow ports for any blockages. Additionally, inspect the brush rollers for any debris or dirt that may be causing the clog. If necessary, use a pair of scissors to cut away any obstructions.
Finally, once you’ve ensured that all parts of your vacuum are clear, test your machine to check if performance has returned. If everything appears to be in good condition, your Oreck XL21 vacuum should be unclogged and ready to use once again! With just a few simple steps, you can easily get back to cleaning in no time.
Troubleshooting
To keep your Oreck XL vacuum cleaner running smoothly, troubleshooting any clogs is essential. Here are some simple steps to help identify the source of the problem. To start, if you suspect a clog in your Oreck, an easy way to see if you are correct is to turn the machine on and look at the outer bag. If the bag inflates, then you don’t have a clog. If it stays flat, you have a clog!
Next, you should check for any debris buildup on the brush roll, edges of the vacuum head, or surrounding areas. Use a stiff bristle brush to dislodge the buildup before attempting to unclog the vacuum. This is simply preventative maintenance that will keep your machine running at its best! Additionally, replacing the Oreck XL vacuum bag will ensure sufficient airflow. We have some of the most commonly needed parts below.


Now, we come move on to disassembling the vacuum cleaner which may be necessary to identify more complex blockages. Before proceeding, switch off and unplug the vacuum from all power sources to prevent damaging any components or hurting yourself. Once you have taken these precautions, you can proceed to disassemble the machine…
Disassembling Your Oreck XL
If you’ve identified a clog in your Oreck XL21 vacuum cleaner, it’s time to disassemble it. However, it’s important to have some knowledge of how the vacuum is built and which parts may need to be removed to access the clog. Follow these steps to guide you through the process:
- Unplug the vacuum from the wall outlet.
- Take out the bag and check for blockages.
- Open up the vacuum cleaner to locate the clog.
- Remove any screws and panels necessary to access the affected area.
- Disconnect any parts that require removal.
To ensure a successful unclogging process, take your time to assess all of the components and make sure you understand which pieces need to be detached. With proper care and attention to detail, you can avoid further issues when reassembling your vacuum cleaner. With patience and attention to detail, you can proceed with clearing the clog.
Cleaning The Clogged Parts
Once you have identified the location of the clog in your vacuum cleaner, the next step is to remove it. There are various ways to do so, depending on the severity and location of the blockage.
One way to remove the clog is to use another vacuum. Connect the hose of the other vacuum to the clogged hose of your Oreck Elevate Conquer vacuum cleaner and turn both machines on. The suction power of the second vacuum can help dislodge and remove the clog in your Oreck vacuum cleaner.
Forceps or long-nosed pliers can also be useful tools for removing a clog in your vacuum cleaner. If the clog is located in a narrow tube or small crevice, you can use these tools to grab and pull out the debris.
Another option is to use a straightened coat hanger or similar tool to carefully loosen and dislodge the clog. Be sure to use caution when using any tool to remove a clog, so as not to damage any of the vacuum’s components.
Conclusion
Unclogging an Oreck XL21 does not have to be a daunting task. With the right knowledge and tools, anyone can easily get the job done. It’s important to pay attention to the warning signs of clogging and regularly clean the machine to avoid future blockages.
The best practice is to take a few moments each month to inspect your vacuum cleaner for any potential issues that may arise, such as changing your brush roll and belt. Taking preventative measures can save you time and effort in the long run, so don’t hesitate if you think something might be wrong with your machine. With regular maintenance, you’ll be able to keep your Oreck XL vacuum cleaner running smoothly for years to come.