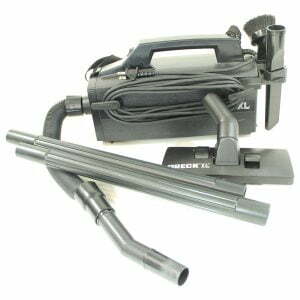
How To Service And Repair An Oreck Buster B Handheld Vacuum
Have you ever been frustrated with your Oreck Buster B Handheld Vacuum not working properly? Do you need to know how to service and repair it, but don’t know where to start? If so, this article is for you! You won’t believe the simple steps necessary to get your vacuum up and running again. So, keep reading…you’re sure to be impressed!
Do you have a vacuum that’s seen better days? Are there areas of your home that are difficult to clean because of it? Don’t despair – it’s actually quite easy to service and repair an Oreck Buster B Handheld Vacuum. With just a few simple tools, some patience, and a little bit of know-how, you can make sure that your vacuum is in top condition in no time.
In this article, we’ll walk you through the process step-by-step. We’ll tell you what tools you need and how to use them. Plus, we’ll provide helpful tips that will make servicing and repairing your Oreck Buster B Handheld Vacuum easier than ever before. So don’t wait any longer – let’s dive in and get started!
Preparing To Service Your Oreck Buster B Handheld Vacuum
Let’s dive into the deep end and get our hands dirty. Preparing to service and repair the Oreck Buster B Handheld Vacuum is like a treasure hunt – you never know what hidden gems you will find!
Before starting, make sure that you have all the necessary tools: a Phillips screwdriver, a flathead screwdriver, needle-nose pliers, and an electrical tester are all must-have items. Additionally, if you don’t have these items at home it would be wise to order them online or purchase them from a local hardware store. It would also be best to have a new Oreck Buster B vacuum bag handy, as replacing that is recommended.
It’s also important to read through your vacuum’s user manual before attempting any repairs or servicing; this will give you an idea of how your vacuum works and where certain components are located. Once familiarised with the user manual, you should be good to go! Now, let’s take the next step and jump into disassembling and troubleshooting the Oreck Buster B Handheld Vacuum.
Disassembling And Troubleshooting Your Oreck Buster B
Disassembling and troubleshooting the Oreck Buster B handheld vacuum can be daunting, but with the right tools and patience it can be done. First, unscrew the screws on the bottom to access the interior of the device. Next, remove any dust or debris that might have accumulated in various parts of the vacuum. Finally, inspect all of the components for signs of wear and tear.
After inspecting each part, it’s time to begin taking apart the vacuum itself. Carefully unscrew each piece of hardware and set aside in an organized fashion. Check to ensure nothing is broken so that you can easily reassemble everything later. Take note of any worn out or damaged pieces you come across while disassembling—replacing them should be your priority when reassembling. One common replacement is the Buster B hose, which simply plugs right in.
Then, check for any loose connections inside the vacuum that could cause a malfunction or safety hazard. If a connection appears loose or frayed, rewire it as necessary before putting everything back together again. This step is essential to ensuring that your Oreck Buster B handheld vacuum runs properly after servicing and repairs are complete. With these steps completed, you’re now ready to move on to reassembling and finalizing your repair job!
Reassembling And Finalizing the Oreck Buster B
Putting together a jigsaw puzzle is like reassembling an Oreck Buster B Handheld Vacuum. You have all the pieces, but you need to be precise and methodical in order to create the final product. Here are three tips for successful reassembly:
1. Follow the instruction manual that came with your vacuum – this will ensure that you place each part back in the right place and configuration.
2. Take your time – rushing can lead to costly mistakes or even damage to the parts.
3. Have extra tools handy – have a few extra screws and bolts available in case any of them get lost during the process.
Reassembling an Oreck Buster B Handheld Vacuum requires patience and precision, but with these tips you’ll be able to put it back together quickly and easily so you can get back to cleaning up those pesky dirt and dust particles!
Conclusion
The Oreck Buster B Handheld Vacuum is an amazing tool for cleaning hard-to-reach areas. Servicing and repairing this vacuum can be a daunting task, but it doesn’t have to be if you know what you’re doing. After following the steps outlined in this article, you should now feel confident that you can service and repair your own Oreck Buster B Handheld Vacuum with ease.
Working on the vacuum yourself not only saves you time and money, but it gives you a sense of accomplishment when the job is done. You can now enjoy the convenience of using your Oreck Buster B Handheld Vacuum without worrying about things going wrong or needing repairs anytime soon.
So, take pride in knowing that you’ve just completed a challenging task that most people would think twice about attempting. With your newfound knowledge and skills, servicing and repairing your Oreck Buster B Handheld Vacuum should be a breeze from here on out!