How to Replace the Lower Hose on a Shark NV752 Vacuum – Shark Repair Guide
Shark Lower Hose Repair
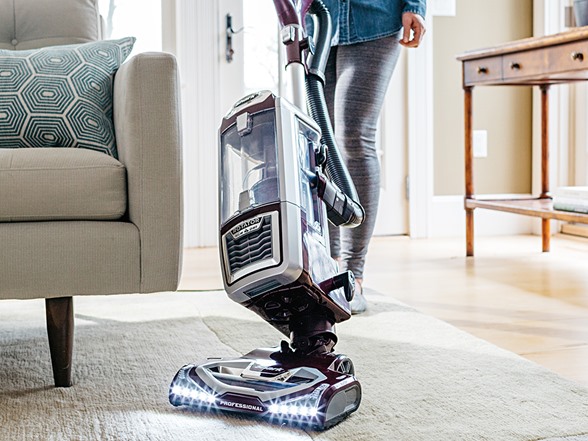
Replacing the lower hose on a Shark NV752 vacuum cleaner is an essential repair that can restore suction power and improve overall performance. Over time, the lower hose can develop cracks, tears, or clogs that impact airflow, reducing the vacuum’s effectiveness. This guide provides a step-by-step process to help you successfully replace the lower hose, ensuring your vacuum continues to function at its best. While this guide focuses on the Shark NV752, the same steps apply to other models in the NV750 series and similar Shark vacuum designs. Whether you’re dealing with a loss of suction, unusual noises, or visible hose damage, this repair will help extend the life of your vacuum and maintain optimal cleaning efficiency.
What parts do you need?
We sell high-quality replacement parts to ensure long-lasting and effective repairs! You can also check the schematic page for this vacuum cleaner.
A clogged or damaged lower hose can significantly reduce suction power, making it difficult for your Shark NV650 to pick up debris effectively. If you notice weak suction despite cleaning the filters and checking for blockages elsewhere, the lower hose may need to be replaced.
Hose Cracks
Visible cracks, holes, or tears in the lower hose can lead to air leaks, reducing suction and overall vacuum performance. If your Shark vacuum is struggling to pick up dirt, check the lower hose for any signs of physical damage.
Loss of Suction When Reclining
If your vacuum works fine when upright but loses suction when tilted back, a faulty lower hose could be the culprit. This hose flexes when the vacuum reclines, and wear over time can lead to partial or complete loss of suction.
Whistling Sounds
A damaged or partially clogged lower hose can create high-pitched whistling noises while the vacuum is running. If you hear an unusual sound coming from your Shark NV650, inspect the hose for cracks, holes, or blockages that could be restricting airflow.
Let's get down to business...
Step-by-Step Repair Guide
Step 1: Prepare for Disassembly
Identify the Hose: Locate the cracked or damaged lower hose on the vacuum’s power head.
Gather Tools: You will need a Phillips head screwdriver and a T20 security bit to remove the screws.
Step 2: Remove the Base Plate
Unscrew the Base Plate:
Front Screws: There are two shorter screws with regular-sized heads and one short screw with a smaller head in the center.
Center Screws: Remove the screw holding down the clear cover in the middle. This screw has a small head as well.
Security Bit: Use the T20 security bit to remove the special screw in the center.
Total Screws: Ensure all 11 fasteners are removed. This includes:
2 short screws on either side of the brush roller with regular heads.
2 small screws with smaller heads in the front.
1 T20 security screw in the center.
Step 3: Access and Remove the Damaged Hose
Expose the Hose: Carefully lift the base plate off, exposing the hose and internal components.
Wires: Be cautious with the wires; avoid moving them more than necessary to prevent rerouting issues later.
Cut the Wire Inside the Hose:
Use wire cutters to cut the wire inside the damaged hose.
Remove the Hose: The hose may come out easily or require some effort. If the plastic part of the hose remains stuck, use needle-nose pliers to extract it.
Step 4: Prepare the New Hose
Clean the Hose Connection Points:
Spray isopropyl alcohol on the connection points to clean them.
Focus on cleaning the ends of the hose that will be glued, but it doesn’t have to be perfect.
Select the Right Adhesive:
Avoid Super Glue: Use an adhesive that maintains flexibility. Super glue and similar products that dry rigid are not suitable.
Apply Adhesive: Apply the adhesive to the ends of the new hose.
Step 5: Install the New Hose
Insert the New Hose:
Screw one end of the new hose into the connection point.
Apply adhesive to the other end and screw it into place.
Reposition the Hose and Wires:
Ensure the hose sits correctly inside the power head.
Align the peg at the bottom and position the exhaust port correctly.
Reroute the wires through their original channels.
Step 6: Reassemble the Power Head
Snap the Top On:
After the hose and wires are in place, snap the top cover back onto the power head.
Replace the Screws:
Reinsert the screws in their original positions:
2 skinny Phillips screws in the front.
1 T20 security screw in the center.
The remaining screws around the perimeter.
Step 7: Test the Repair
Check for Proper Assembly: Ensure all screws are tightened and the hose is securely in place.
Power On: Plug in the vacuum and test to make sure the hose replacement was successful and the vacuum is functioning properly.
You also might need...
Other Items for This Repair
While completing this repair, you should check these other important items on your vacuum cleaner to ensure the best possible performance and longevity!
By following this guide, you should now have successfully replaced the lower hose on your Shark NV752 vacuum cleaner. A properly installed hose restores suction, enhances cleaning performance, and extends the life of your machine, helping you avoid costly replacements and unnecessary waste.
As a final reminder, use a flexible adhesive to ensure a secure yet pliable connection, and be mindful of any internal wiring while performing the repair. With regular maintenance and careful handling, your Shark vacuum will continue to provide reliable performance for years to come.
We offer comprehensive part diagrams and repair tutorials to help you keep your vacuum running at its best. VacuumsRus is your one-stop-shop for anything vacuum cleaner related!