How to Replace a Simplicity S20 and Riccar R20 Vacuum Clutch

Riccar R20 and Simplicity S20 Clutch Replacement Guide

Riccar and Simplicity vacuums are renowned for their powerful suction and efficient cleaning performance. However, like any mechanical device, these vacuums may require occasional maintenance. One common issue users may encounter is a malfunctioning brush roll clutch. The brush roll clutch is a crucial component responsible for engaging and disengaging the brush roll, allowing the vacuum to transition smoothly between carpeted and non-carpeted surfaces. If you find that your vacuum is struggling to switch between these surfaces or the brush roll isn’t spinning properly, it might be time to replace the brush roll clutch. Fear not! In this step-by-step guide, we’ll walk you through the process of replacing the brush roll clutch in Riccar or Simplicity vacuums.

Models this article is relevant to include:
Simplicity Symmetry Models SYMCL, SYMCLNT, SYMC, SYMCNT, SYMCL.USA, SYMD, SYMDL, SYME, SYMENT, SYMUSA.SU, SYM.USAFS, SYMP, SYMPNT, SYMS, SYMST
Simplicity Models S20D, S20P, S20UP
Simplicity Models 7 series with on off switch for brush roller
Simplicity Models 6 series with on off switch for brush roller
Riccar Vibrance Models VIBPBP.2, VIBCBP.1, R20D, R20P, R20UP

Riccar R20 Clutch Replacement

Before you begin, gather the following materials:

  1. New brush roll clutch (compatible with your vacuum model)
  2. Screwdriver (Phillips and flathead)
  3. Needle-nose pliers
  4. Small bowl or container (for screws)
  5. Work surface or clean area
Below are the clutch, clutch pad, felt seal, and entire brush roll assembly for Riccar and Simplicity R20 and S20 vacuum cleaners.

If the parts listed are not correct for your model, click here to be directed to our schematics / parts list page where you can search your Riccar or Simplicity model to find the right parts that you need.

Below is a full video tutorial with our authorized Riccar, Simplicity, and CleanMax technician where he shows you how to complete this repair.

Simplicity and Riccar Brush Roll Clutch Replacement Step-by-Step

Step 1: Prepare Your Work Area

Before you begin, make sure your vacuum is unplugged from the power source. Find a clean, well-lit work area where you can easily access the vacuum’s underside. Lay the vacuum on its back to expose the brush roll and clutch assembly.

Step 2: Remove the Brush Roll Cover

Locate the brush roll cover, which is typically secured with screws. Use a Phillips screwdriver to remove these screws and carefully lift off the brush roll cover. Set aside the screws in a small bowl or container to avoid losing them.

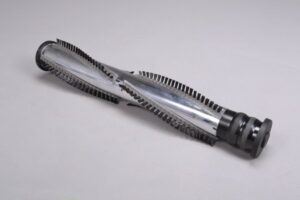
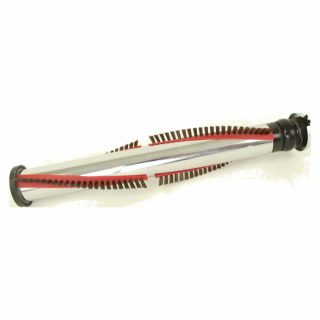
Step 3: Disconnect the Brush Roll

Once the brush roll is exposed, carefully slide it out of its housing. Take note of its orientation, as you’ll need to reinstall it the same way later.

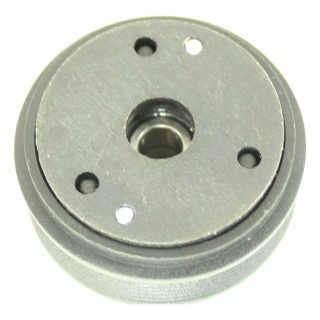
Step 4: Access the Brush Roll Clutch

With the brush roll removed, you’ll have a clear view of the brush roll clutch. This component is usually held in place with screws or clips. Use your screwdriver to remove these fasteners and gently lift the brush roll clutch from its position.

Step 5: Install the New Brush Roll Clutch

Take your new brush roll clutch and align it with the mounting points on the vacuum. Secure it in place using the screws or clips you removed earlier.

Step 6: Reassemble the Vacuum

Place the brush roll back into its housing, ensuring it aligns properly. Then, reattach the brush roll cover and secure it with the screws you set aside.

Step 7: Test the Vacuum

Plug in your vacuum and turn it on to ensure that the new brush roll clutch is functioning correctly. Test the vacuum on both carpeted and non-carpeted surfaces to verify that the brush roll engages and disengages smoothly.

Conclusion:

Replacing the brush roll clutch in your Riccar or Simplicity vacuum may seem like a daunting task, but with the right tools and a systematic approach, it can be a straightforward process. Regular maintenance ensures your vacuum continues to deliver optimal cleaning performance, so don’t hesitate to tackle necessary repairs when needed. If you encounter any challenges during the process or are unsure about any step, consult your vacuum’s user manual or seek professional assistance.