How to Replace a Cord on a Riccar, Simplicity, or CleanMax Lightweight with the Switch in the Handle
Riccar, Simplicity, and CleanMax Vacuum Cord Replacement Guide
The power cord in a vacuum cleaner is a critical component, providing the necessary electrical connection for the machine to operate effectively. In Riccar, Simplicity, and CleanMax vacuum cleaners, where the cord enters into the handle grip area, wear and tear over time may necessitate a cord replacement. If you notice fraying, exposed wires, or any other signs of damage to the cord, it’s essential to replace it promptly to ensure the safety and optimal performance of your vacuum cleaner. In this step-by-step guide, we will walk you through the process of replacing the cord on these vacuum cleaners with handle grip entry.
Models this article is relevant to include:
Riccar Models R10S R10D R10P R10SAND R17
Simplicity Models S10S S10D S10P S10SAND
Clean max Zoom 500 and 700
Handle Cord Replacement on Simplicity, Riccar, and CleanMax Vacuums
Materials Needed:
- Replacement power cord (compatible with your vacuum model)
- Phillips screwdriver
- Flathead screwdriver
- Wire stripper/cutter
- Electrical tape
- Heat shrink tubing (optional)
- Heat gun (optional)
- Work surface or clean area
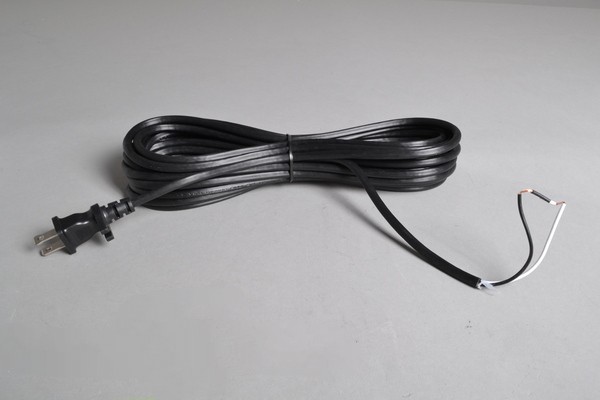
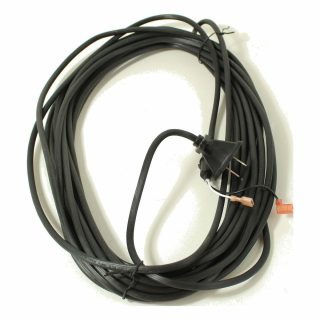
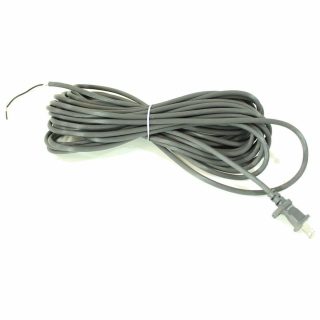
Below you can find several cord assemblies for your Riccar, CleanMax, or Simplicity vacuum cleaner. These include genuine cord assemblies and aftermarket cords.
-
 Sale!
Sale!


If the parts listed are not correct for your model, click here to be directed to our schematics / parts list page where you can search your Riccar or Simplicity model to find the right parts that you need.
Below is a full video tutorial with our authorized Riccar, Simplicity, and CleanMax technician where he shows you how to complete this repair.
Cord Replacement on Riccar, Simplicity, and CleanMax Vacuums with Switch in Handle Step-by-Step Guide
Step 1: Prepare Your Work Area
Before starting the replacement process, unplug the vacuum cleaner from the power source and ensure it is in the off position. Place the vacuum on a clean and stable work surface to facilitate easy access to the cord entry point in the handle grip area.
Step 2: Remove Screws Securing the Handle Grip
Using a Phillips screwdriver, carefully remove the screws that secure the handle grip in place. These screws are typically located on the sides or bottom of the handle grip. Set aside the screws in a small container to prevent misplacement.
Step 3: Access the Cord Entry Point
Once the handle grip is removed, you will have access to the cord entry point. Identify the location where the old cord is connected to the vacuum.
Step 4: Disconnect the Old Cord
Gently disconnect the old cord from its terminals or connectors inside the handle grip area. Take note of the cord’s routing and how it is secured in place.
Step 5: Remove the Old Cord
Slide the old cord out of the handle grip, carefully navigating it through any guides or channels. Discard the old cord responsibly.
Step 6: Prepare the Replacement Cord
Cut the replacement cord to the appropriate length, ensuring it matches the specifications of the original cord. Strip the insulation from the ends of the new cord using a wire stripper, exposing a sufficient length of wire for connection.
Step 7: Connect the Replacement Cord
Connect the stripped ends of the replacement cord to the terminals or connectors inside the handle grip, following the routing observed with the old cord. Secure the connections, ensuring they are snug and free of any exposed wires.
Step 8: Insulate the Connections
Wrap the connected wires with electrical tape to insulate them and provide added protection. For an extra layer of security, you may use heat shrink tubing and a heat gun to encapsulate the connections.
Step 9: Route the Replacement Cord
Carefully route the replacement cord through the guides or channels inside the handle grip, ensuring it follows the original path.
Step 10: Reassemble the Handle Grip
Secure the handle grip back in place by tightening the screws you removed earlier. Ensure that the grip is securely attached to maintain the structural integrity of the vacuum cleaner.
Step 11: Test the Vacuum
Plug in the vacuum cleaner and turn it on to ensure that the replacement cord functions properly. Check for any unusual sounds or movements and confirm that the vacuum operates as expected.
Conclusion:
Replacing the cord on a Riccar, Simplicity, or CleanMax vacuum cleaner with handle grip entry is a task that can be accomplished with some basic tools and attention to detail. Timely replacement of a damaged cord ensures the continued safety and reliable performance of your vacuum cleaner. If you encounter any difficulties during the process or are unsure about any step, consult your vacuum’s user manual or seek professional assistance. By taking care of your vacuum, including regular maintenance and necessary repairs, you can extend its lifespan and keep it functioning at its best.