How To Change The Brush Strips On A Simplicity Vacuum Cleaner
Are you fed up of dealing with worn out brush strips on your Simplicity Vacuum Cleaner? If so, you’re not alone. Many vacuum cleaner owners struggle with this issue and can find themselves frustrated when the machine stops working as it should. The good news is that changing the brush strips doesn’t have to be a hassle. In this article, we’ll show you how to do it quickly and easily.
If you’ve had enough of dealing with worn brush rolls, then read on! We’ll walk you through the process step-by-step, from removing the old strips all the way to putting in the new ones. You’ll be amazed at how easy it is – no more struggling around with no end in sight! Plus, by doing it yourself, you’ll save time and money compared to taking it to a repair shop.
So don’t despair – learn how to change the brush strips on your Simplicity Vacuum Cleaner today! With our straightforward guide, we’ll have your machine running like a dream in no time. Let’s get started!
Identifying The Right Brush Strip For Your Simplicity Vacuum Cleaner
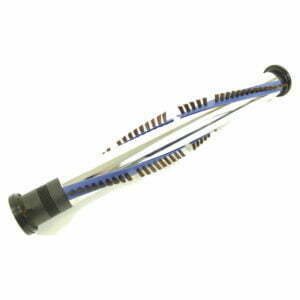
When it comes to changing the brush strip on a Simplicity vacuum cleaner, the first step is to identify the right one for your model. This can be done by consulting the user manual or contacting Simplicity customer service directly. You can also see our selection of Riccar and Simplicity schematics. After finding the correct brush strip, you’ll need to remove the old one. To do this, there are several steps that must be taken.
To start with, switch off the power supply and unplug the vacuum cleaner. Next, carefully unscrew any screws or clips that hold the brush strip in place, as well as gently lifting away any guards or covers that are hindering access. If necessary, use a screwdriver to loosen stubborn screws and ensure all pieces are labeled so they can be re-fitted later on.
Once everything is removed and you have access to the brush strip itself, slowly pull it away from its slot until it’s completely detached from the machine. It may require some force in order to free it from its housing but take care not to damage any of its components in doing so. With that done, you’ve successfully removed your old brush strips and can now continue with fitting a new one.
Removing The Old Brush Strips
The second step in changing your brush strip on a Simplicity vacuum cleaner is to remove the old brush strips. This can be done by first unplugging the vacuum cleaner and then turning it over so you can access the underside of the base. Here, you’ll find two screws that hold on the cover plate of the roller brush assembly. Unscrew these with a Phillips-head screwdriver and remove the cover plate. The old brush strip will be beneath this plate and will need to be pulled out. It’s important to note that if a belt is wrapped around the brush strip, it should be removed before attempting to take out the brush strip itself.
Next up is removing any remaining debris or dirt from inside of your roller brush assembly before installing your new brush strip. Using a cotton swab or other small tool, carefully clear away any pieces of old fabric, dust, dirt, or hair that may have been left behind from your previous roller. Once this is complete you can move forward with installing your new brush strip.
Before doing so, however, make sure that all of your components are in good working order and there are no signs of damage before reassembling them together. Doing so will ensure that everything works properly when you use your vacuum again for cleaning!
Installing New Brush Strips
Replacing the brush strips on a Simplicity vacuum cleaner is not a difficult task. With the right approach, it can be done relatively quickly.
Swapping out the old brush strip for a new one requires some preparation and care to ensure that everything goes smoothly. To begin, make sure you have the proper tools and materials within reach. It is also helpful to unplug the vacuum before starting in order to prevent any accidents from happening.
Once everything is set up, start by lifting off the cover of the vacuum and gently removing the existing brush strip. Then, carefully install the new brush strip into place, making sure that it is properly secured. After this step is completed, replace the cover of the vacuum and plug it back in if necessary. With these few steps, you can enjoy your freshly upgraded vacuum cleaner!
Conclusion
The process of replacing the brush strips on a Simplicity vacuum cleaner is simple and straightforward. With just a few basic tools, you can have your vacuum up and running again in no time. That’s why it’s so important to keep your brush strips in good condition; if they become worn out, they’ll be less effective at picking up dirt and dust.
In fact, research shows that worn-out brush strips can cause up to 20% more dust to remain in carpets after vacuuming. That’s why it’s so important to check your brush strips regularly and replace them when needed.
So don’t put off replacing your Simplicity vacuum cleaner’s brush strips any longer; take the time to change them now and enjoy clean carpets for years to come!